

How to Read Drill Bit Wear: A Practical Guide to Dull Bit Inspection
Using wear patterns to improve bit selection and drilling performance
A used drill bit should not be treated as simple scrap. In fact, the wear pattern left on a bit is valuable drilling information.
It can show whether the cutting structure matched the formation, whether the bit met heavy impact, whether gauge protection was enough, and whether operating settings should be changed.
Because of this, professional drilling teams inspect a bit after it comes out of the hole.
Quick summary: Dull-bit inspection means checking cutter wear, gauge condition, blade and body damage, and symmetry — then recording photos and drilling data. In short, a used bit should help you choose and run the next bit better.
Why Dull-Bit Inspection Matters
Two identical drill bits can come back from two boreholes with completely different wear patterns.
The difference may be caused by:
- Formation hardness
- Abrasiveness
- Broken or mixed layers
- Heavy vibration
- Poor hole cleaning
- Wrong weight on bit
- Too much rotary speed
- Weak gauge protection
- Not enough cooling or flushing
However, looking only at the number of meters drilled tells just part of the story. Meanwhile, the location and type of damage can give extra clues.
Inspect the Inner and Outer Cutting Structure Separately
Wear does not always happen evenly across a bit. For a fixed-cutter bit, check the cutting structure from the center toward the gauge.
Look for differences between:
- Inner cutters
- Nose area
- Shoulder cutters
- Gauge area
If one area shows much more damage than the others, the location itself can help point to the likely cause. As a result, this idea is also used in industry dull-grading, where different areas are checked instead of simply calling the whole bit “worn.”
Common PDC Cutter Damage
PDC cutters can show several types of damage. Each one tells a different story.
Normal Wear
A gradual wear flat can form as the cutter works against the formation. Some steady wear is expected during normal drilling.
Chipped Cutters
Small pieces may break off the cutting edge. Because of this, chipping may be linked to impact loading, vibration, formation changes or wrong operating settings.
Broken Cutters
Heavier loading may cause major cutter fracture. In addition, a broken cutter can pass extra load to nearby cutters and speed up more damage.
Lost Cutters
If a cutter is missing, the cause should be checked instead of simply blaming the diamond table. The brazing or attachment area, body condition and nearby impact damage should all be reviewed.
Gauge Wear
The gauge region helps keep borehole diameter. However, heavy gauge wear can lead to an undersized hole.
This can create problems when:
- Running another full-gauge bit
- Installing casing
- Reaming the hole
- Drilling deeper
Therefore, gauge wear can be especially important in abrasive formations.
Blade and Body Damage
Do not check only the cutters. Also check the bit body for:
- Erosion
- Cracks
- Impact marks
- Worn blade edges
- Damaged waterways
- Material loss
Meanwhile, heavy erosion near fluid passages may show that hydraulics, abrasive cuttings or long circulation affected the body.
Roller Cone Bit Inspection
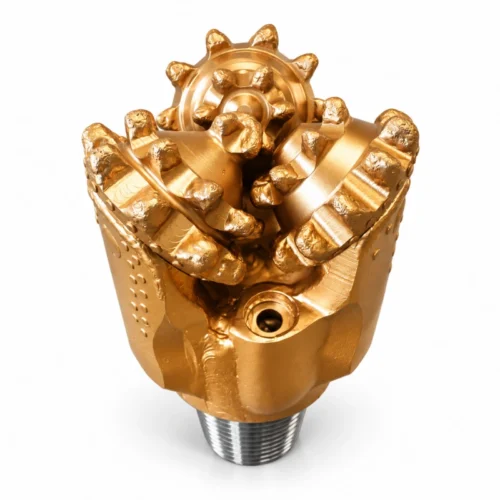
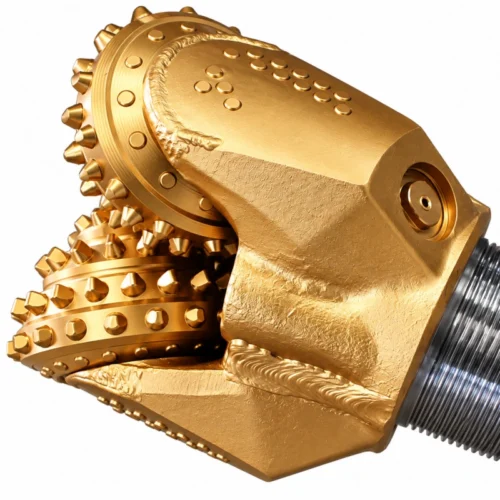
For a tricone bit, inspection should include:
- Teeth or tungsten carbide inserts
- Gauge rows
- Cone rotation
- Cone shell condition
- Bearing condition where applicable
- Missing or broken cutting elements
In addition, uneven wear between the three cones deserves attention. It can point to differences in loading, bearing condition or bottom-hole contact.
Look for Symmetry
One of the simplest field checks is to compare opposite areas of the bit. Fairly even wear often points to balanced loading.
On the other hand, strongly uneven wear may point to instability, eccentric rotation, damaged cutting elements or other drilling-system issues. However, no diagnosis should rest on one symptom alone.
Photograph Every Used Bit
A useful drilling database does not need to be complex. For every important bit run, record:
| Record Item | Why It Helps |
|---|---|
| Bit type | Shows which design was tested |
| Diameter and connection | Confirms compatibility with the rig |
| Formation | Links wear to rock conditions |
| Starting and final depth | Tracks the full drilling interval |
| Meters drilled | Measures bit life in footage |
| Approximate drilling parameters | Shows how the bit was run |
| Reason the bit was pulled | Explains the end of the run |
| Clear photos of the used bit | Shows wear patterns in detail |
Over time, these records can become very useful when choosing future drill bits.
Avoid Oversimplified Conclusions
For example, “broken cutter = poor cutter quality” is not always correct. Cutter failure can also be caused by heavy impact, vibration, wrong formation matching, too much load or poor bit stability.
Likewise, low penetration rate does not automatically mean the bit is dull. Poor hole cleaning, not enough operating energy or wrong formation matching may produce similar symptoms.
Tip: A drill bit spends its working life right against the formation. In other words, its wear pattern holds information that surface operators cannot always see.
Use the Bit as Feedback From the Borehole
Instead of asking only “How long did this bit last?”, also ask “Why did it wear in this particular way?”
As a result, that second question can lead to better bit selection and better drilling practices.
Frequently Asked Questions
What is drill bit wear analysis?
Drill bit wear analysis means checking a used bit for cutter damage, gauge wear, blade and body damage, and wear symmetry. The goal is to understand why the bit wore the way it did.
Why is a used drill bit still useful?
Because the wear pattern shows how the bit met the formation. It can point to impact, vibration, poor cleaning or wrong operating settings, which helps improve the next bit run.
What does uneven wear between cones mean?
Uneven wear between the three cones may point to differences in loading, bearing condition or bottom-hole contact. However, it should be checked together with other signs, not on its own.
Does a broken cutter always mean bad cutter quality?
No. A broken cutter can also be caused by heavy impact, vibration, wrong formation matching, too much load or poor bit stability. Therefore, the whole drilling system should be reviewed.
Conclusion: Every Used Bit Should Teach You Something
Dull-bit inspection is one of the simplest ways to improve drilling knowledge. By recording cutter wear, gauge condition, body damage and operating data, contractors can compare bit runs and spot repeating problems.
In short, a used bit should not only tell you that its service life has ended. Instead, it should help you choose and run the next bit better.
Getting short bit life or unusual wear? Send us your used-bit photos, formation details and drilling parameters. Our team will help you read the wear pattern and recommend a better bit.
Share your formation description, drilling method, bit diameter and connection requirements. We will review your project and respond with a practical recommendation.






 English
 Chinese
 Portuguese
 French
 Spanish
 Russian
 Turkish
 Vietnamese